
User guide
Step-by-step help for buying and selling guest posts, from creating your account to your first live link.
Start here
3 min
Sign up, choose your account type and complete your profile.
Read guide →
2 min
Top up your balance so orders can be paid and held.
Read guide →
5 min
Find a site, send your brief and check out.
Read guide →
2 min
Check the published post and release payment.
Read guide →
Buying links
Everything you need to buy guest posts on Contlinks, in the order you will do it: create your account, set up a project, add funds, choose sites, place an order and approve the live link. Each section shows the real screen from your dashboard. Publishers will find their own section at the end.
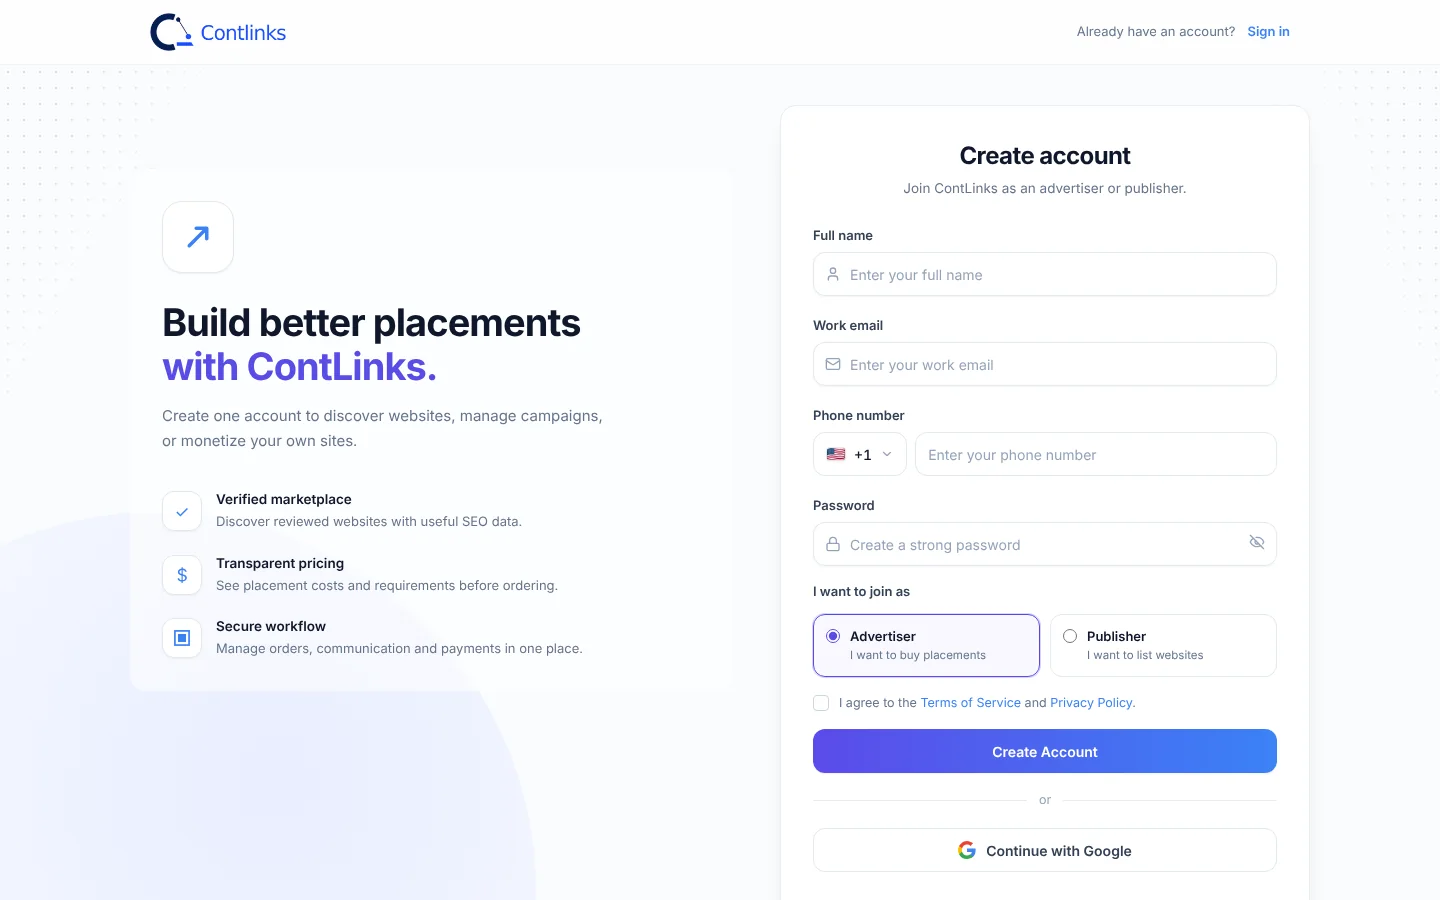
Go to app.contlinks.com/signup and fill in the Create account form. It takes about a minute.
Prefer one click? Use Continue with Google instead. Next time, sign in at app.contlinks.com/login. If you forget your password, use Forgot password? on the sign-in page.
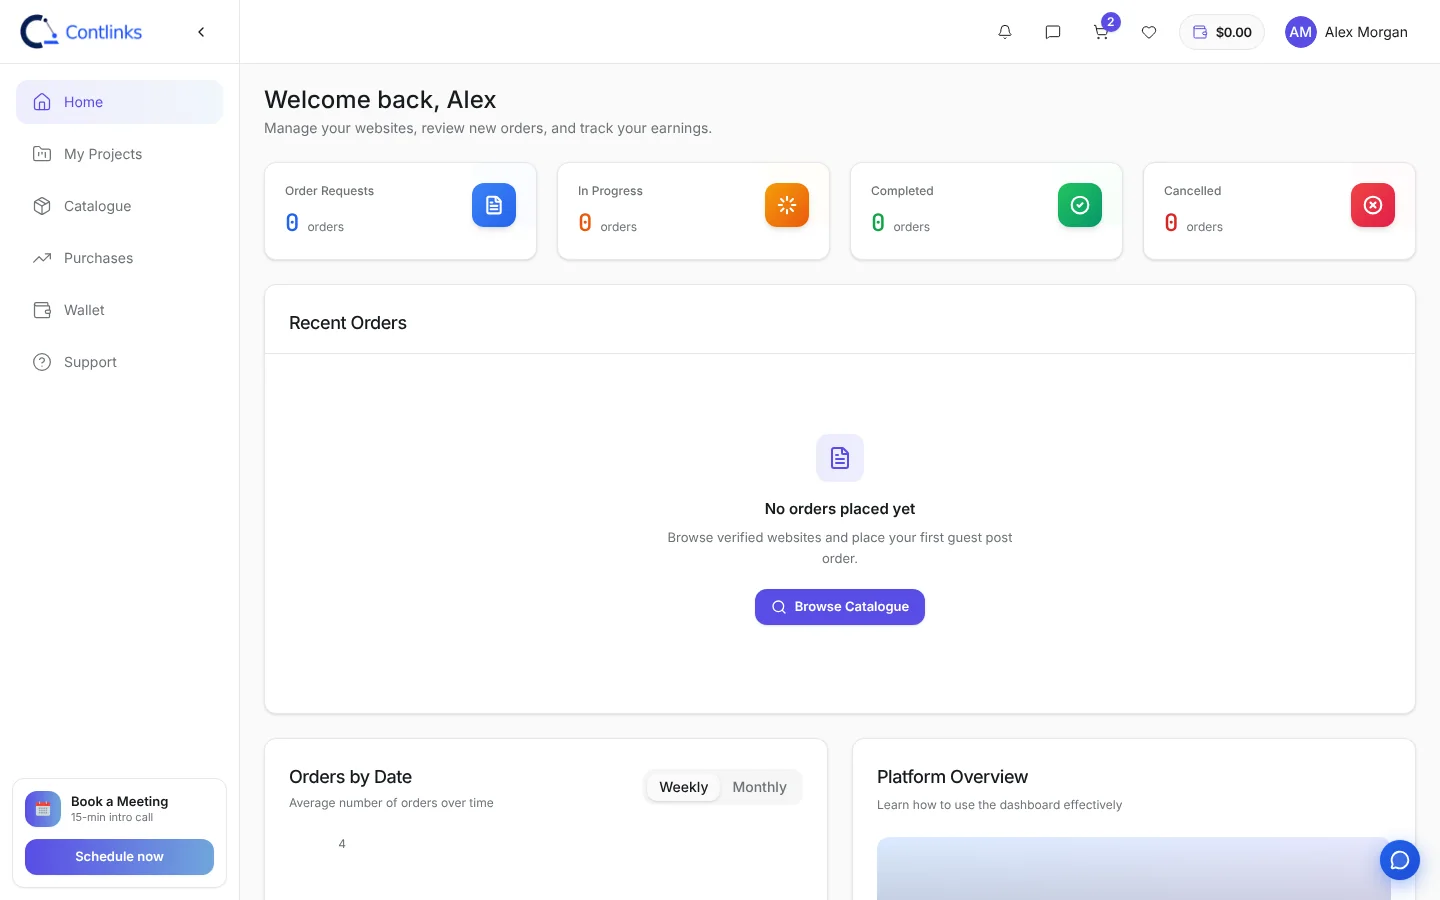
After you sign in you land on Home. The four cards at the top count your Order Requests, orders In Progress, Completed and Cancelled. Below them you will find Recent Orders, an Orders by Date chart, a short Platform Overview video and quick FAQs.
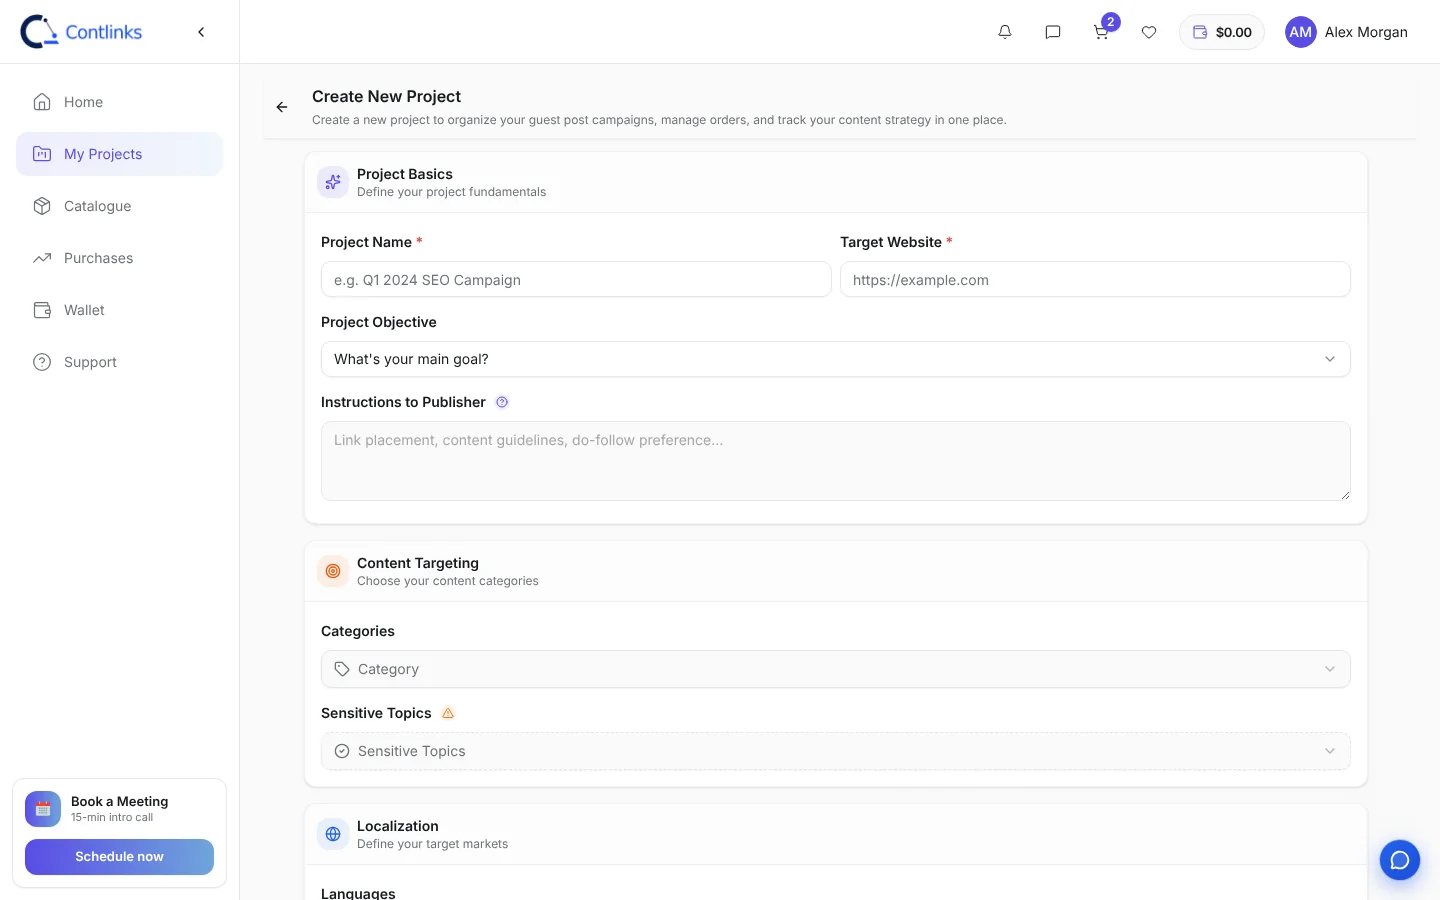
A project groups the orders you place for one website or campaign, so your spending and links stay organised. Every order in your cart must be assigned to a project, so create one before you check out.
Finished campaigns can be moved to the Archived tab so your active list stays short.
Orders are paid from your Contlinks wallet balance, so top it up before you check out. You can add funds by credit or debit card, PayPal or crypto.
Card and PayPal deposits are added to your balance once the payment goes through. Crypto deposits are credited automatically once the transfer confirms on the network, usually within a few minutes.
Tip: Paying with crypto? Send it on the exact network shown at checkout. A transfer sent on another network cannot be recovered.
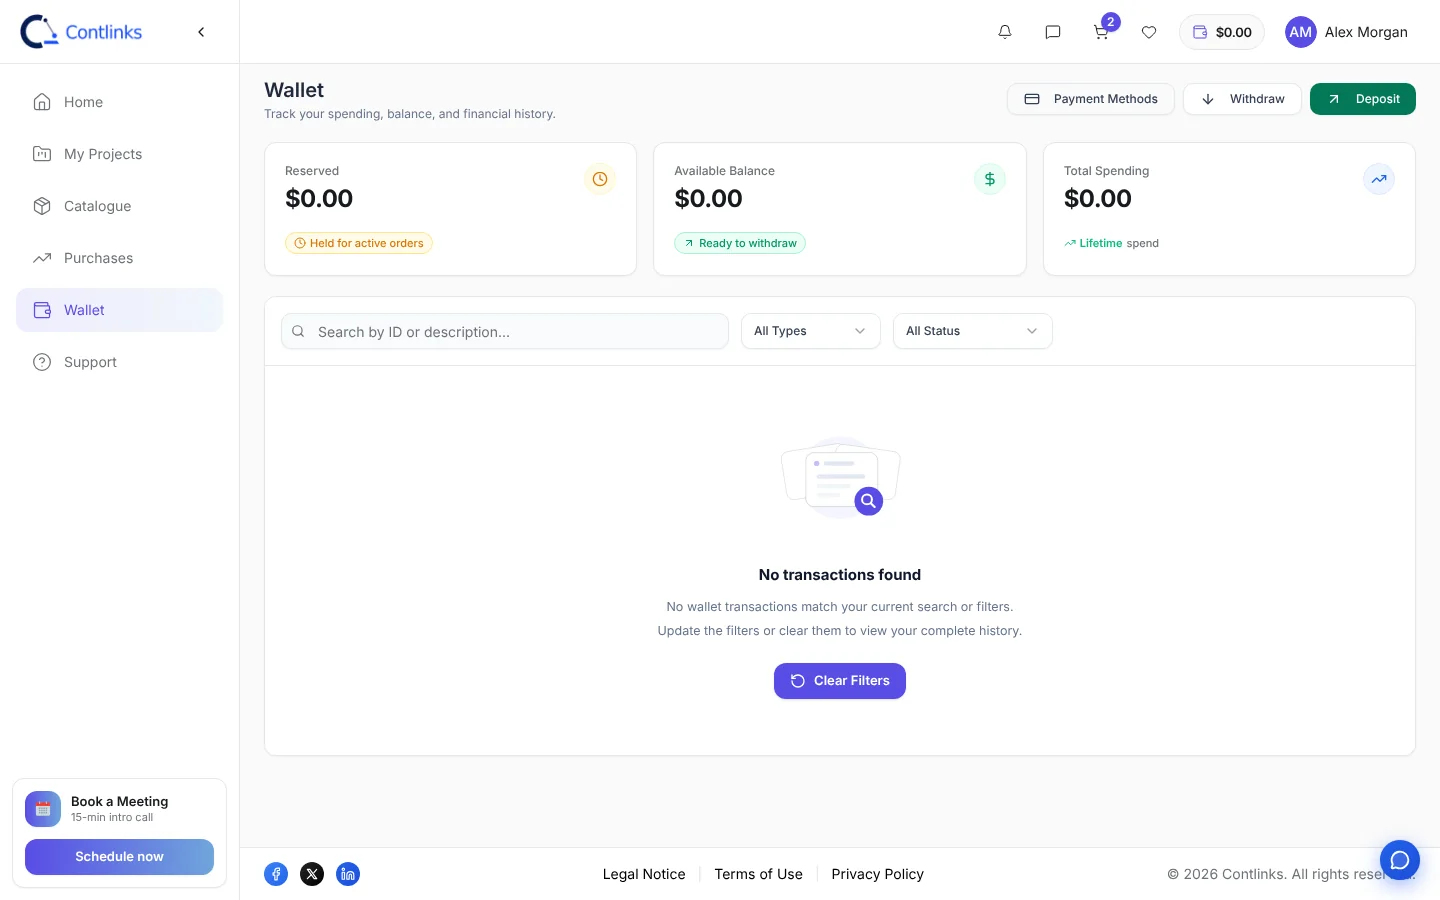
The Wallet page shows three figures. Reserved is money held for active orders. Available is what you can spend right now. Total Spending is everything you have spent on completed orders. Below them, the transaction list can be searched and filtered by type and status.
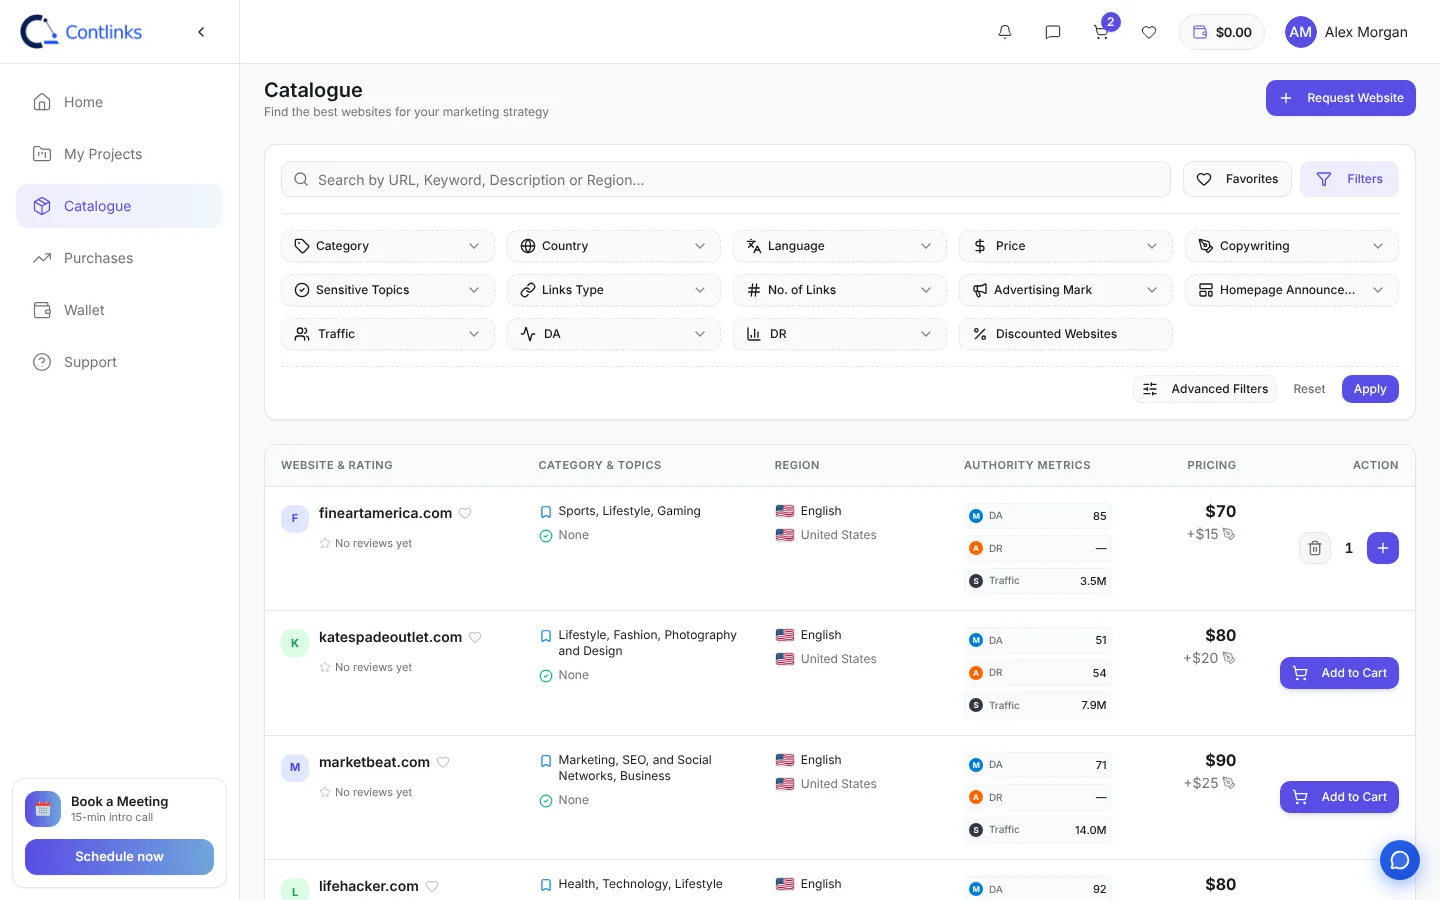
Catalogue lists every publisher site you can order from. Each row shows the site and its rating, categories, language and region, authority metrics (Moz DA, Ahrefs DR and Similarweb traffic) and the price, with the article writing fee shown underneath.
Search by URL, keyword, description or region, or click Filters to narrow the list by:
Open Advanced Filters for more options, then click Apply. Use the heart icon to save a site to Favorites and come back to it later.
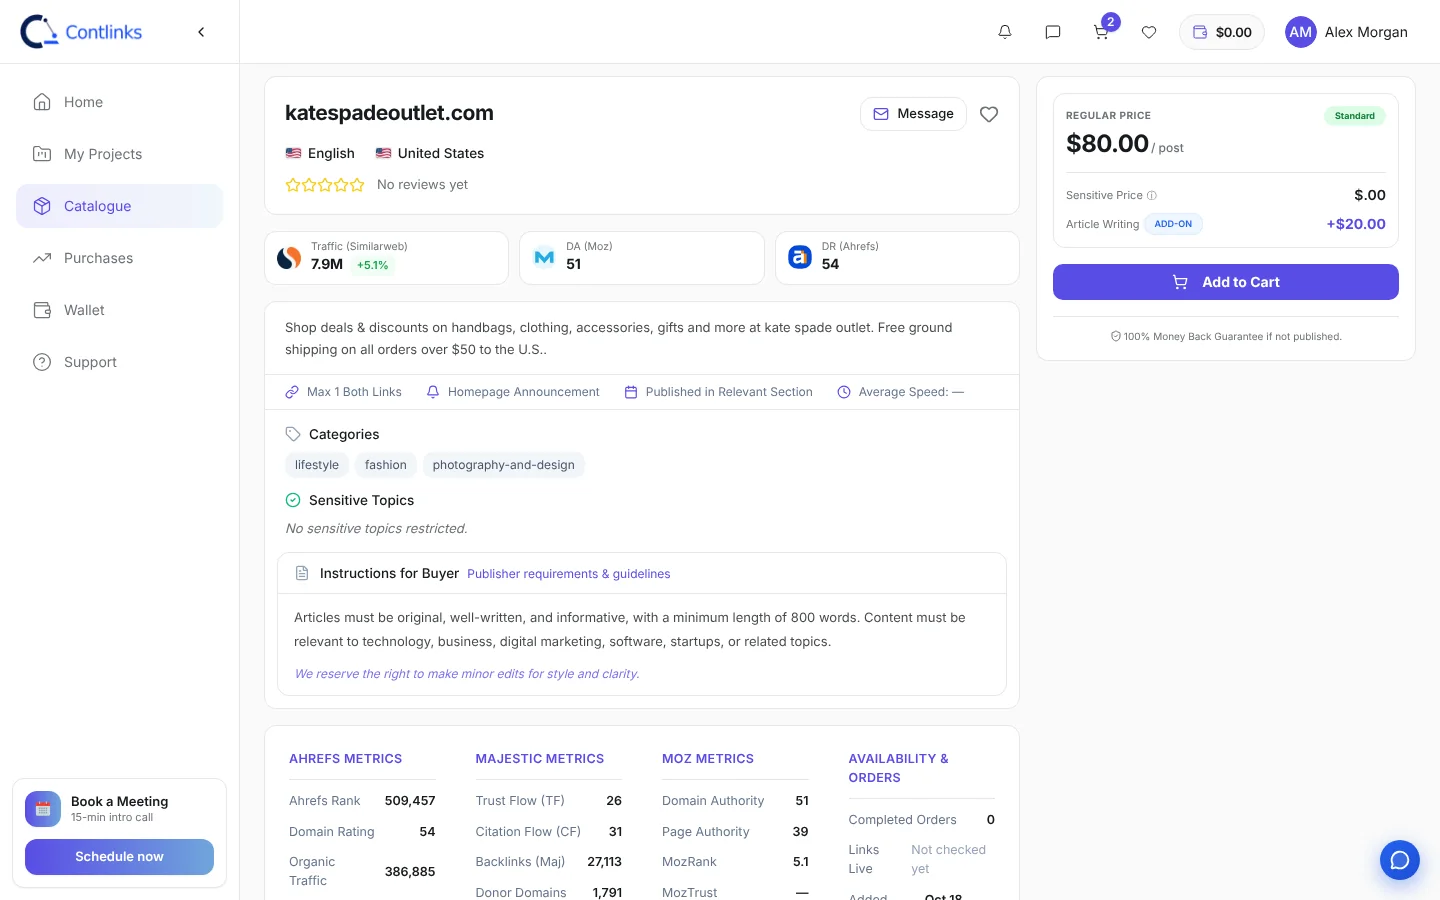
Click any site name to open its page. Before you add it to your cart, check:
Have a question first? Click Message to ask the publisher. Every order is covered by a 100% money-back guarantee if it is not published.
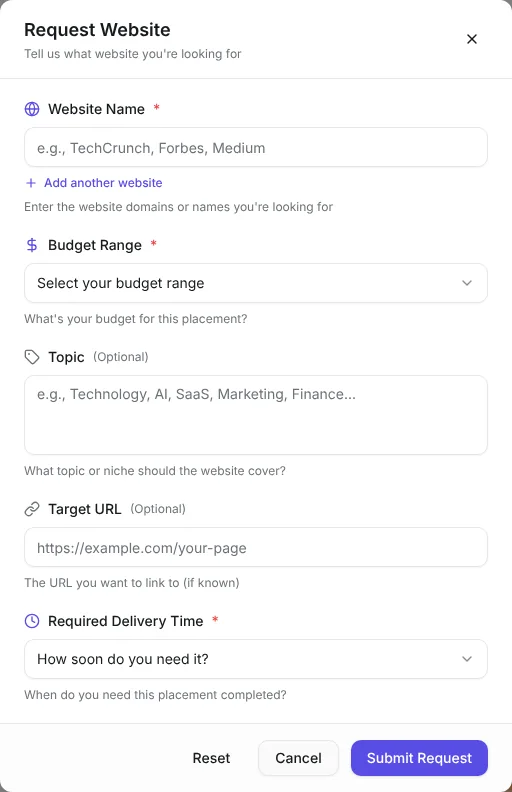
Click Request Website at the top of Catalogue. Enter the website names or domains you are looking for, your budget range and how soon you need the placement. Topic and target URL are optional. Our team will look for a match and get back to you.
Once you have a project and funds in your wallet, ordering takes five steps.
In Catalogue, click Add to Cart next to any site, or add it from the site’s own page. The cart icon in the top bar shows how many sites you have added, and you can check out several sites at once.
Open the cart. For each site, pick the Project the order belongs to (required) and the Order type. Standard is selected by default. A site flagged Missing Details still needs a project or content before you can order.
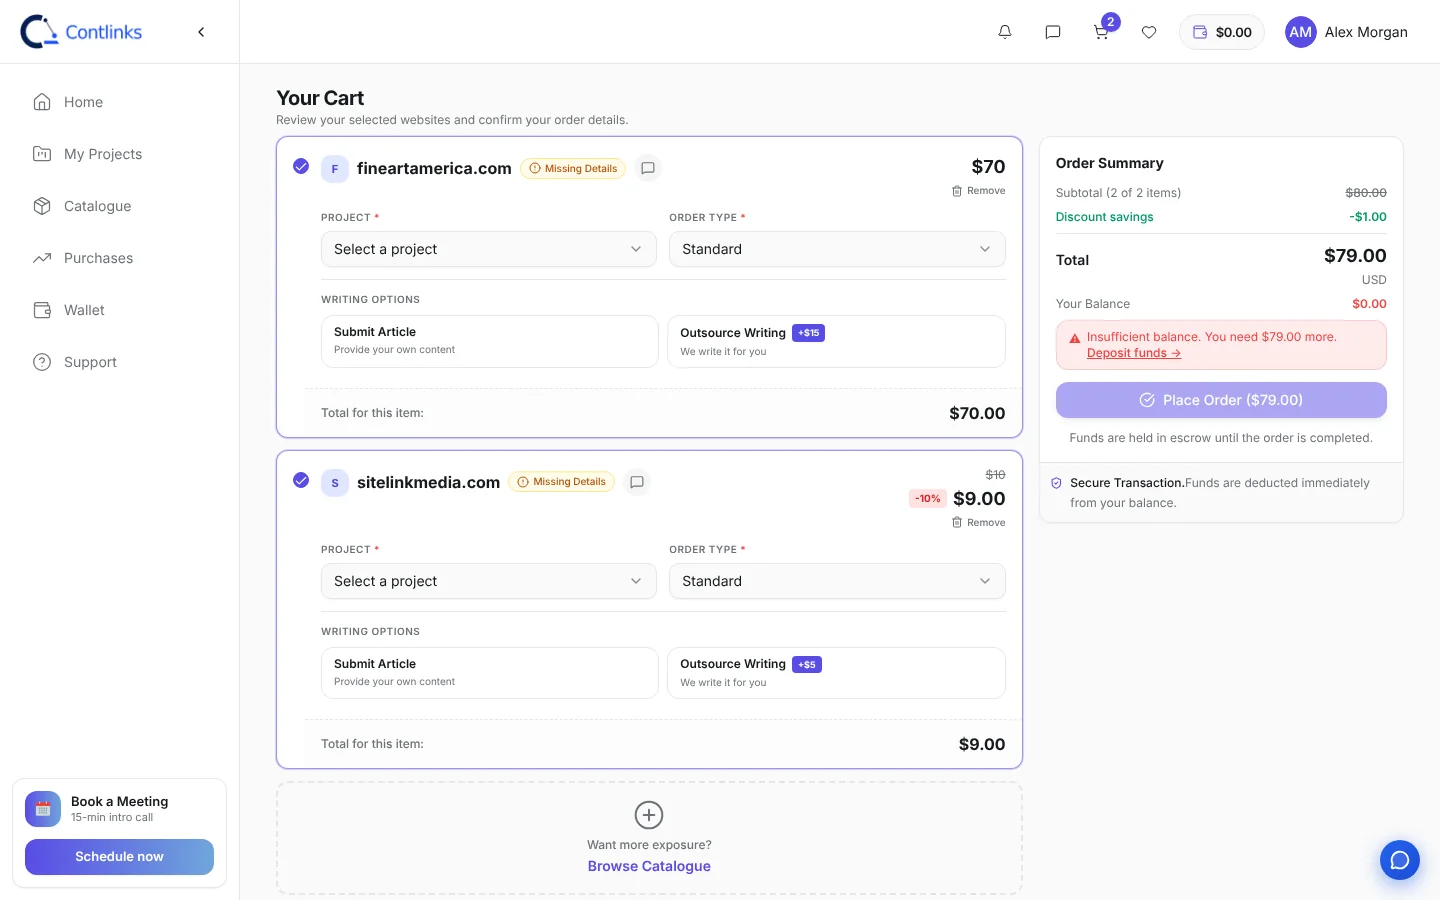
Under Writing options choose one:
The Order Summary shows your subtotal, any discount savings, the total and your wallet balance. If your balance is too low, click Deposit funds and top up first. When everything is ready, click Place Order. The amount is deducted from your balance and held in escrow until the order is completed.
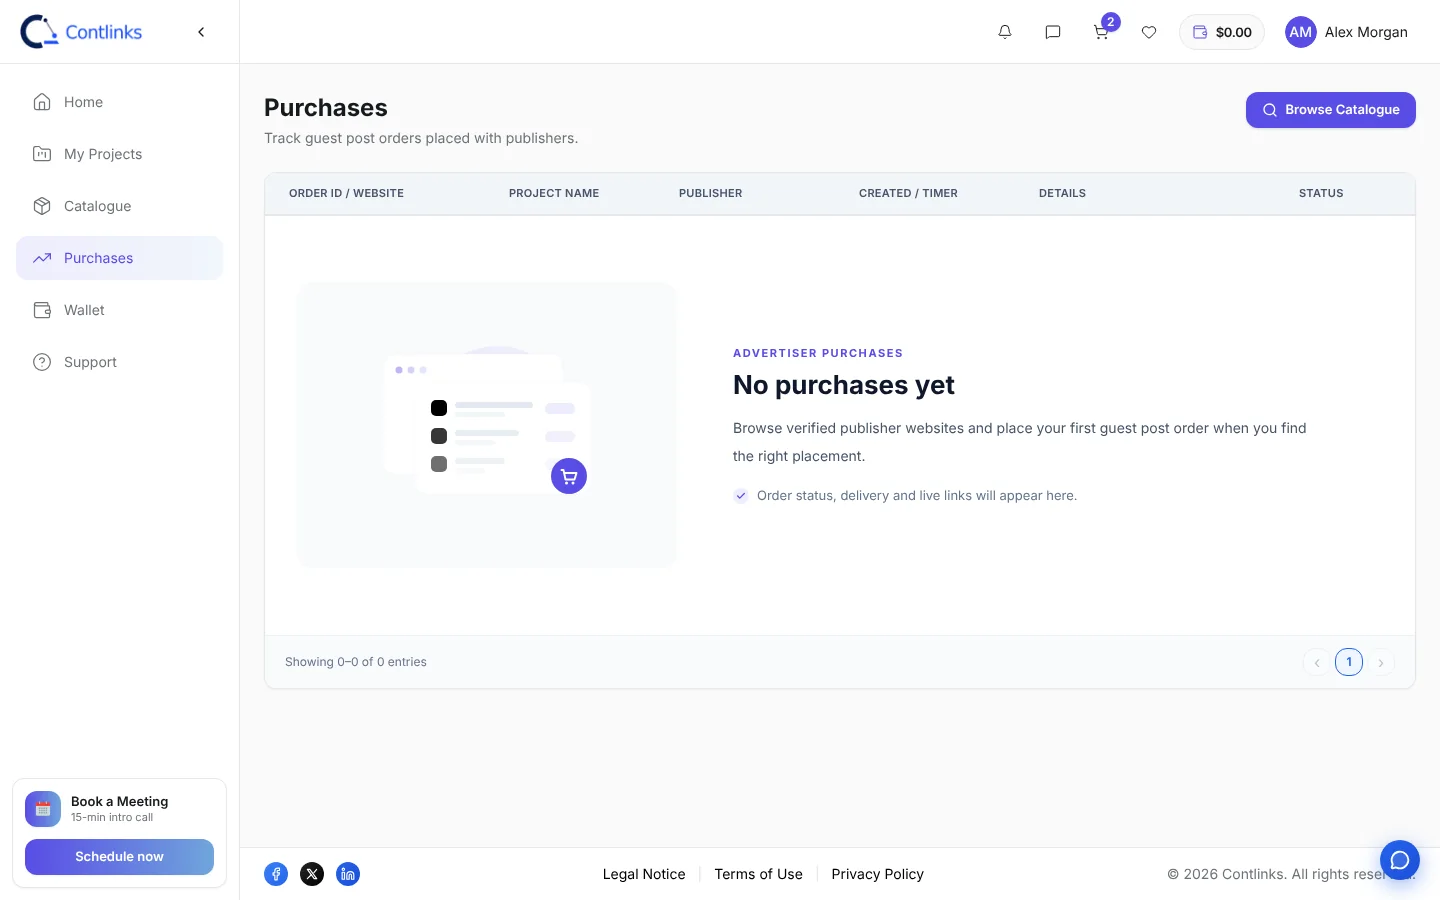
Every order appears in Purchases with its order ID, project, publisher, timer, status and price. Use Chat to message the publisher about that order, and Actions to review and approve it.
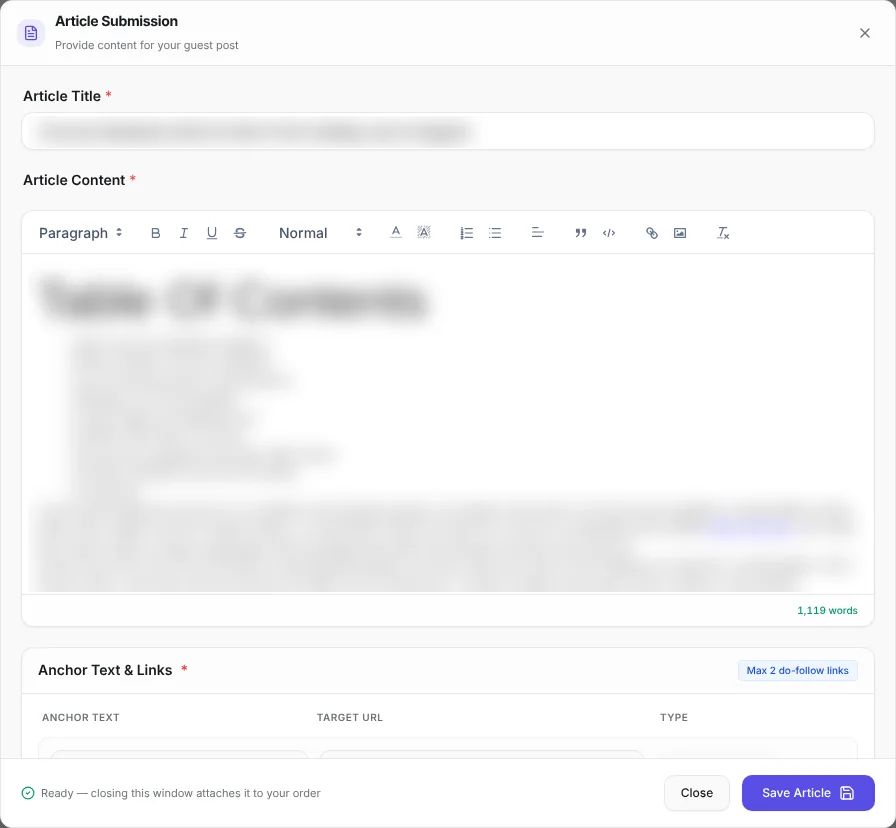
A clear brief gets your post approved faster and avoids revisions. Whether you submit your own article or outsource the writing, follow these rules:
If you are outsourcing the writing, give the publisher a topic, the target URL, your preferred anchor and any points the article must cover.
Tip: Original data, first-hand experience and specific examples make an article far more likely to be accepted as written.
When the publisher has published your post, they submit the live URL and the order moves to awaiting approval. Open the link and check that:
If everything is right, approve the order from Purchases and payment is released to the publisher. If something needs fixing, tell the publisher in the order Chat before you approve.
Tip: If you do not respond within 7 days of the live URL being submitted, the order is approved automatically. Keep an eye on your notifications.
Status
What it means
Your next step
Paid and waiting for the publisher to accept.
Nothing yet
The publisher accepted and is preparing the post.
Reply to any questions in chat
The post is live and the URL has been submitted.
Check the link and approve
You approved the link and payment was released.
Monitoring continues
The publisher declined, or the order expired.
Funds return to your balance
You can review all your activity from three places:
Projects keep each campaign’s orders together, which makes reporting to a client or manager simple.
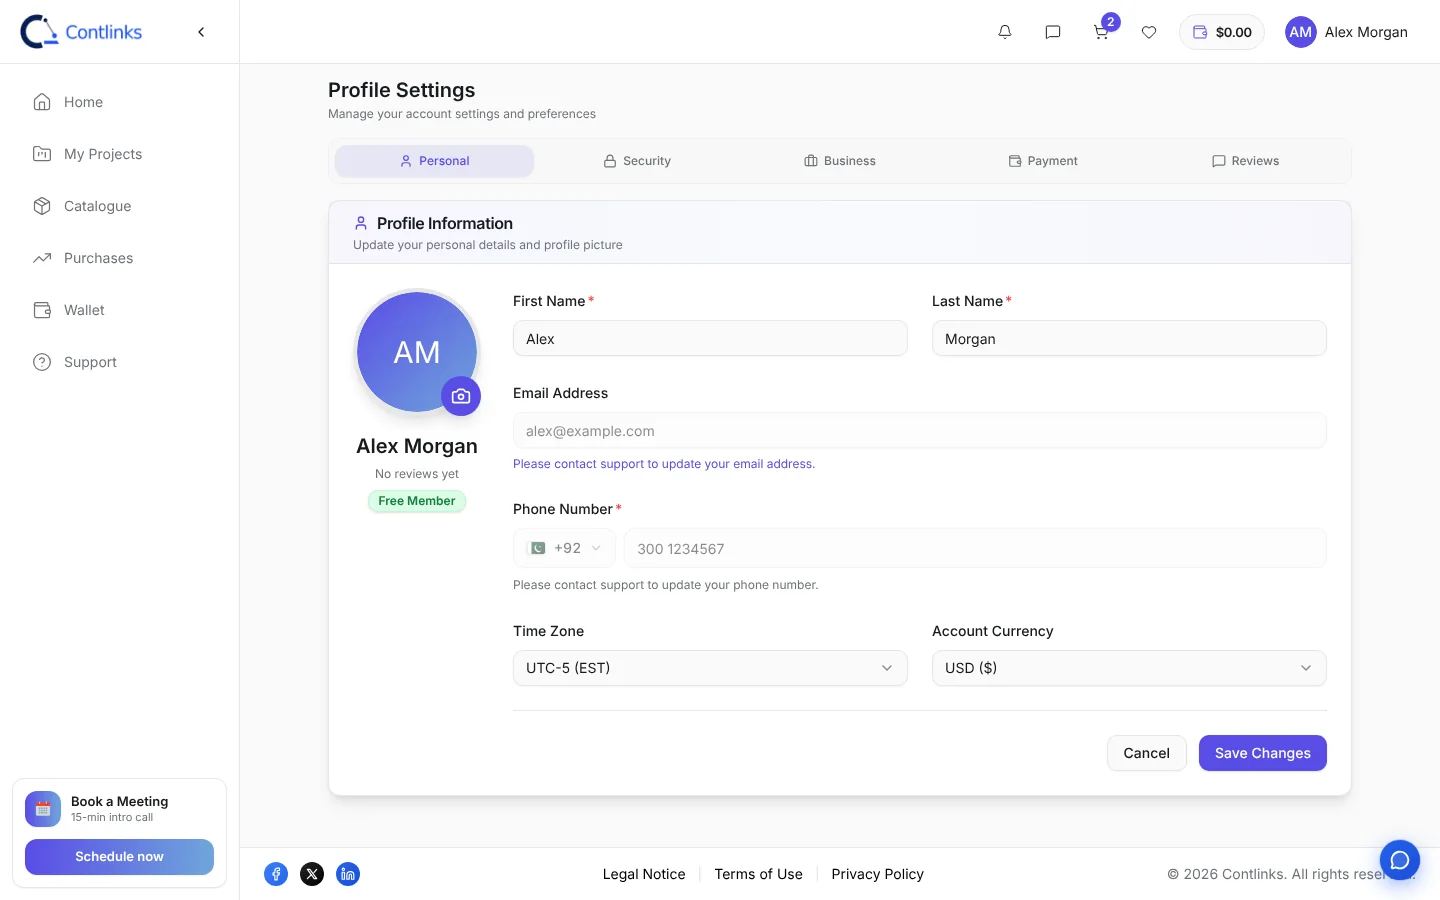
Open your profile menu in the top right and choose Profile Settings. The page has five tabs:
Change the dashboard language from Language in the same profile menu.
Open Support and fill in Create New Support Ticket:
We reply within one working day. Your tickets and their replies appear under My Tickets. For a quick question, use the chat button at the bottom right of any dashboard page, or email support@contlinks.com.
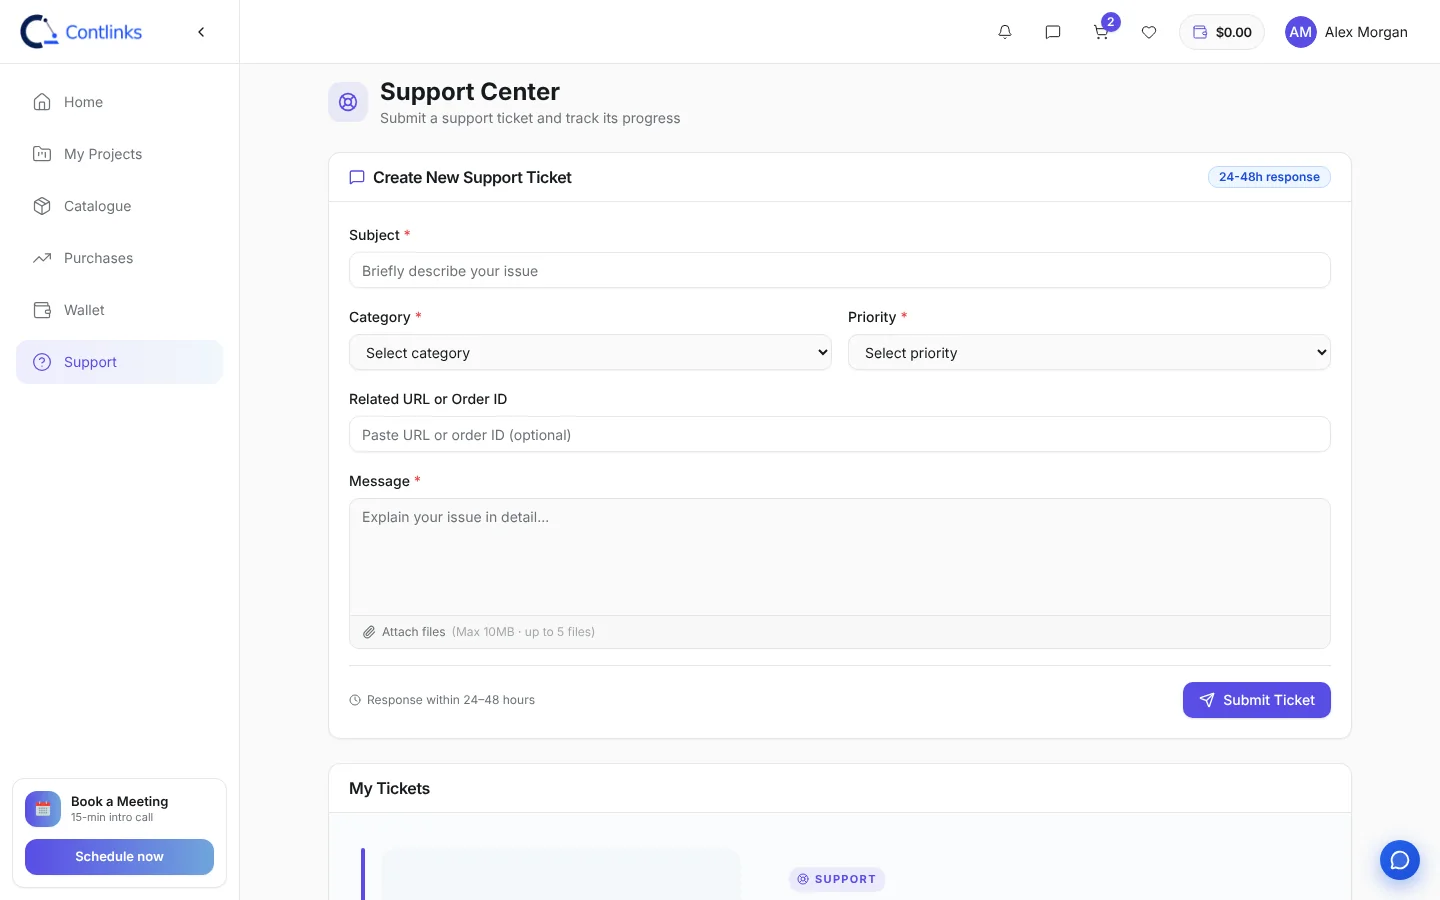
Most problems are solved in the order chat. If you and the publisher cannot agree, raise a dispute within 14 days by opening a support ticket in the Guest Post Approval category with the order ID. Our team reviews the order history and chat, then decides whether the held payment is released or refunded.
Full details are in our Payment Policy and Terms of Use.
Every paid link is guaranteed for 12 months. If it is removed, redirected or changed to nofollow during that time, the publisher must restore it. If they do not, we offer a replacement placement of equal value or a refund to your balance.
Spotted a missing link? Open a support ticket with the order ID and the live URL and we will take it from there.
Publishers list their sites, set their own prices and get paid for every completed order. Sign up and choose Publisher under I want to join as. Your dashboard has five sections: Home, My Portals (your websites), Sales (orders you receive), Wallet and Support.
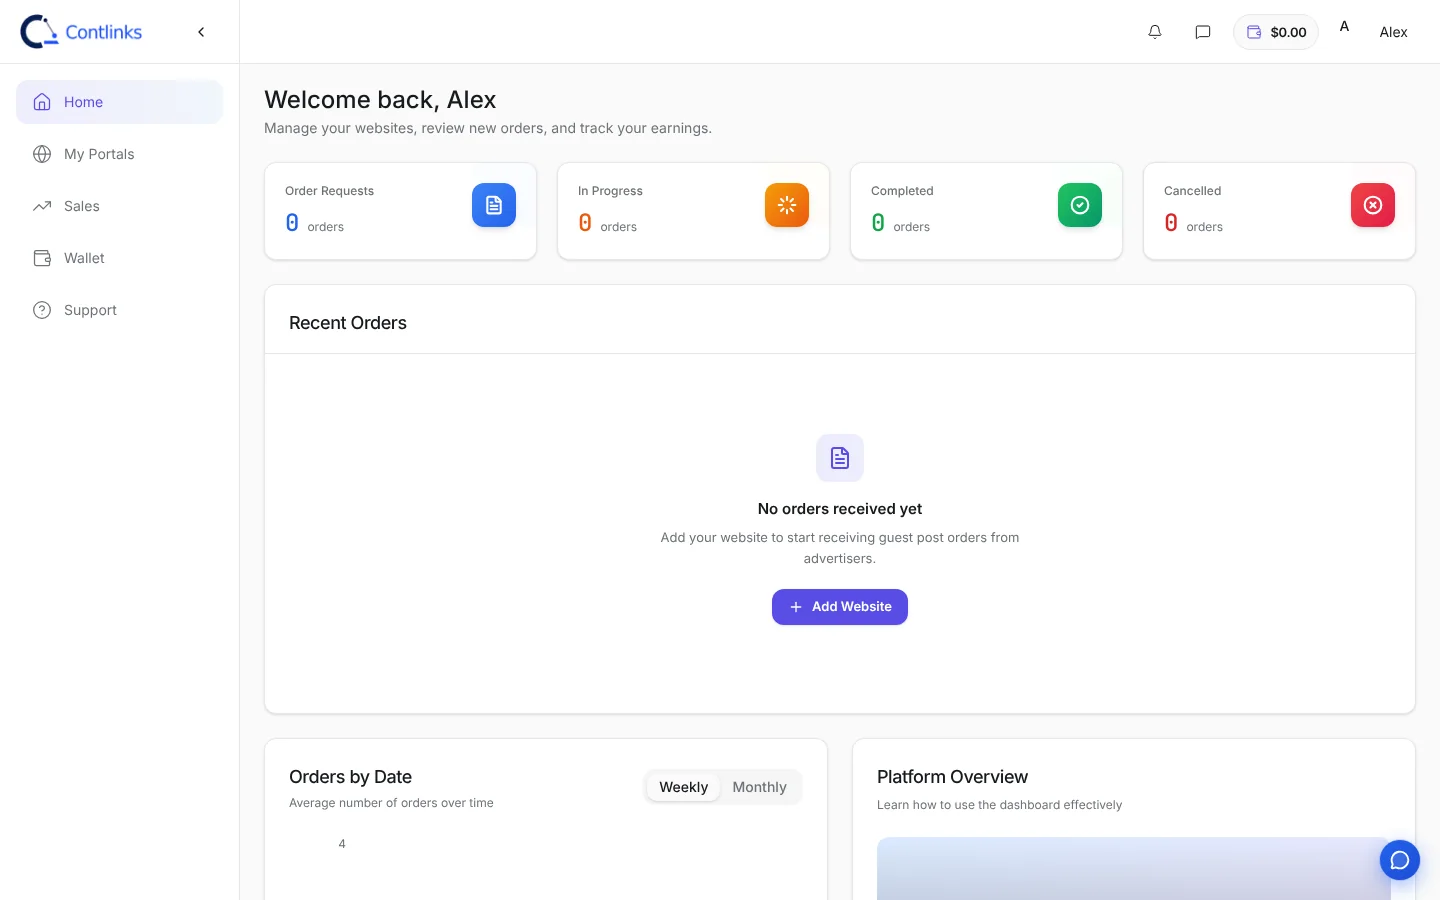
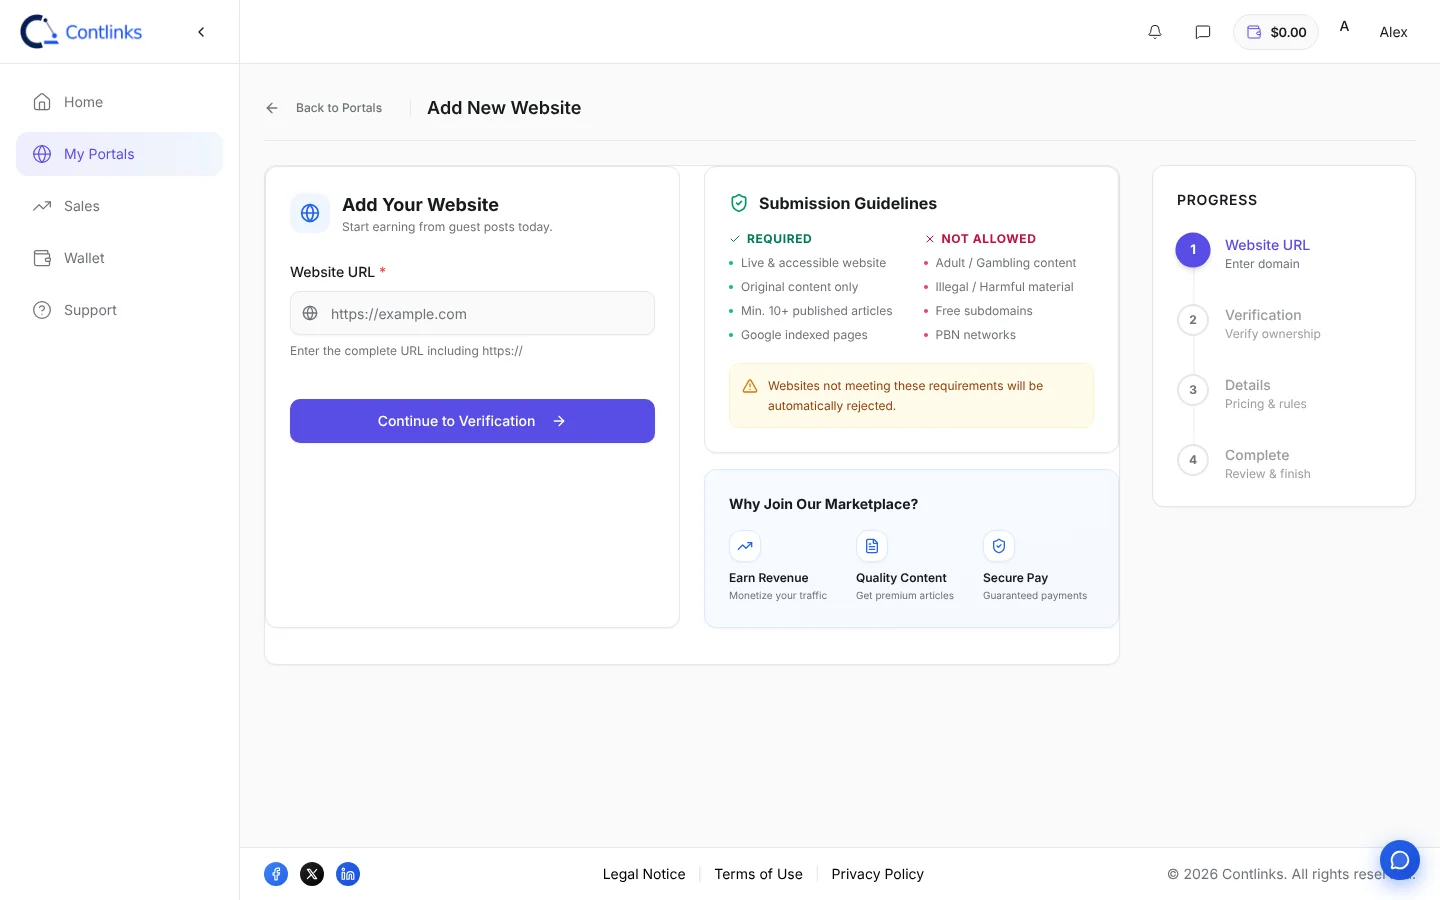
Open My Portals and click Add Website. Adding a site takes four steps:
To be accepted, a site must be live and accessible, publish original content, have at least 10 published articles, be indexed in Google and get at least 1,000 visits a month. Adult or gambling content, illegal or harmful material, free subdomains and PBN networks are not accepted.
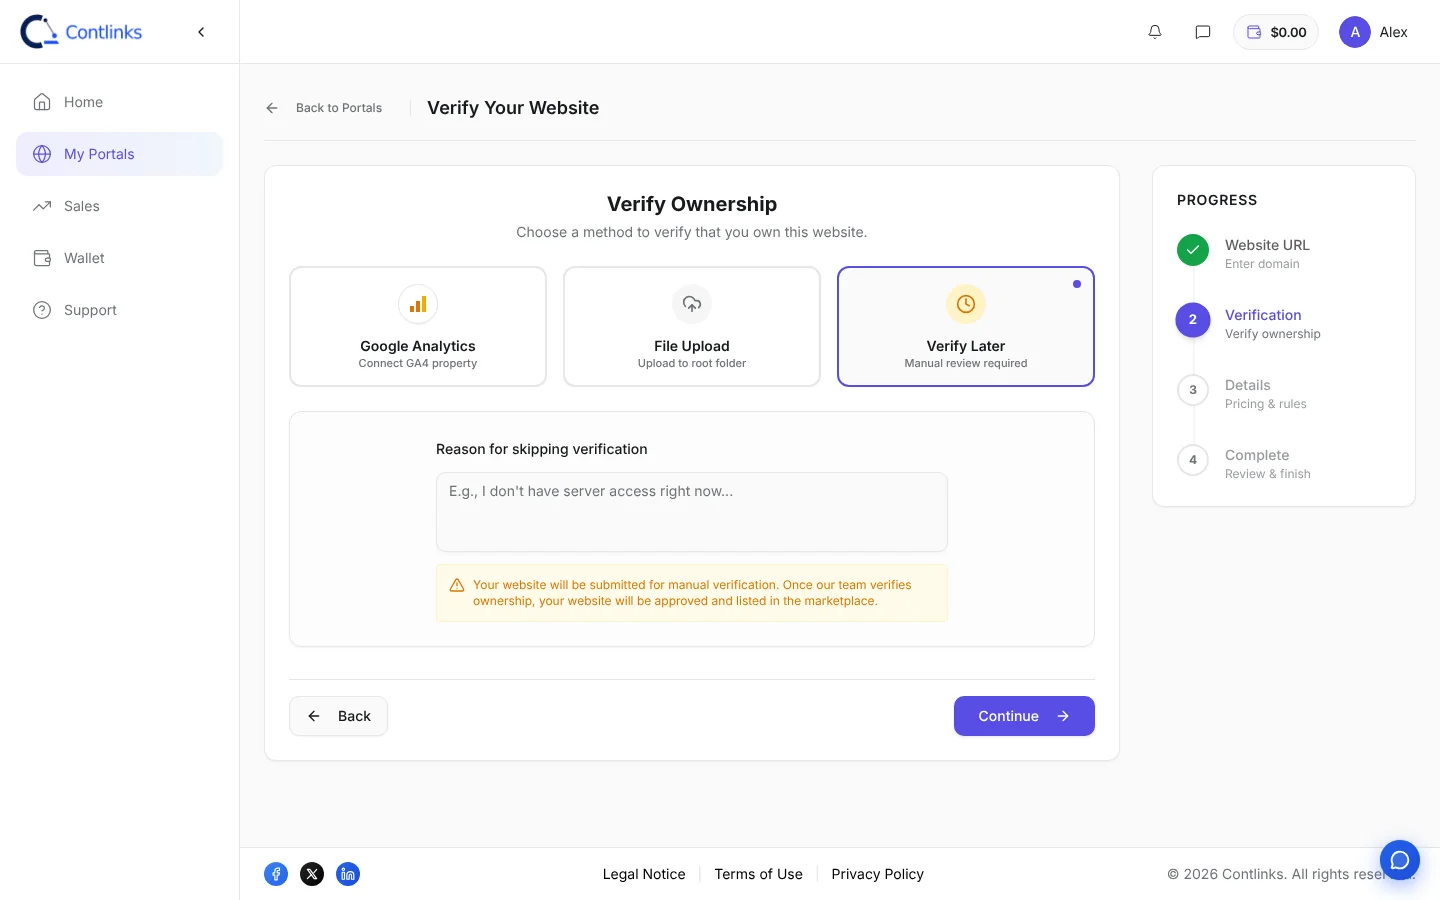
In the Verification step, choose how to prove you own the site:
Verified sites go live faster. Your listing then shows third-party metrics such as Similarweb traffic, Moz DA and Ahrefs DR, so buyers can judge the site before they order. Sites with inflated or unverifiable traffic are not accepted.
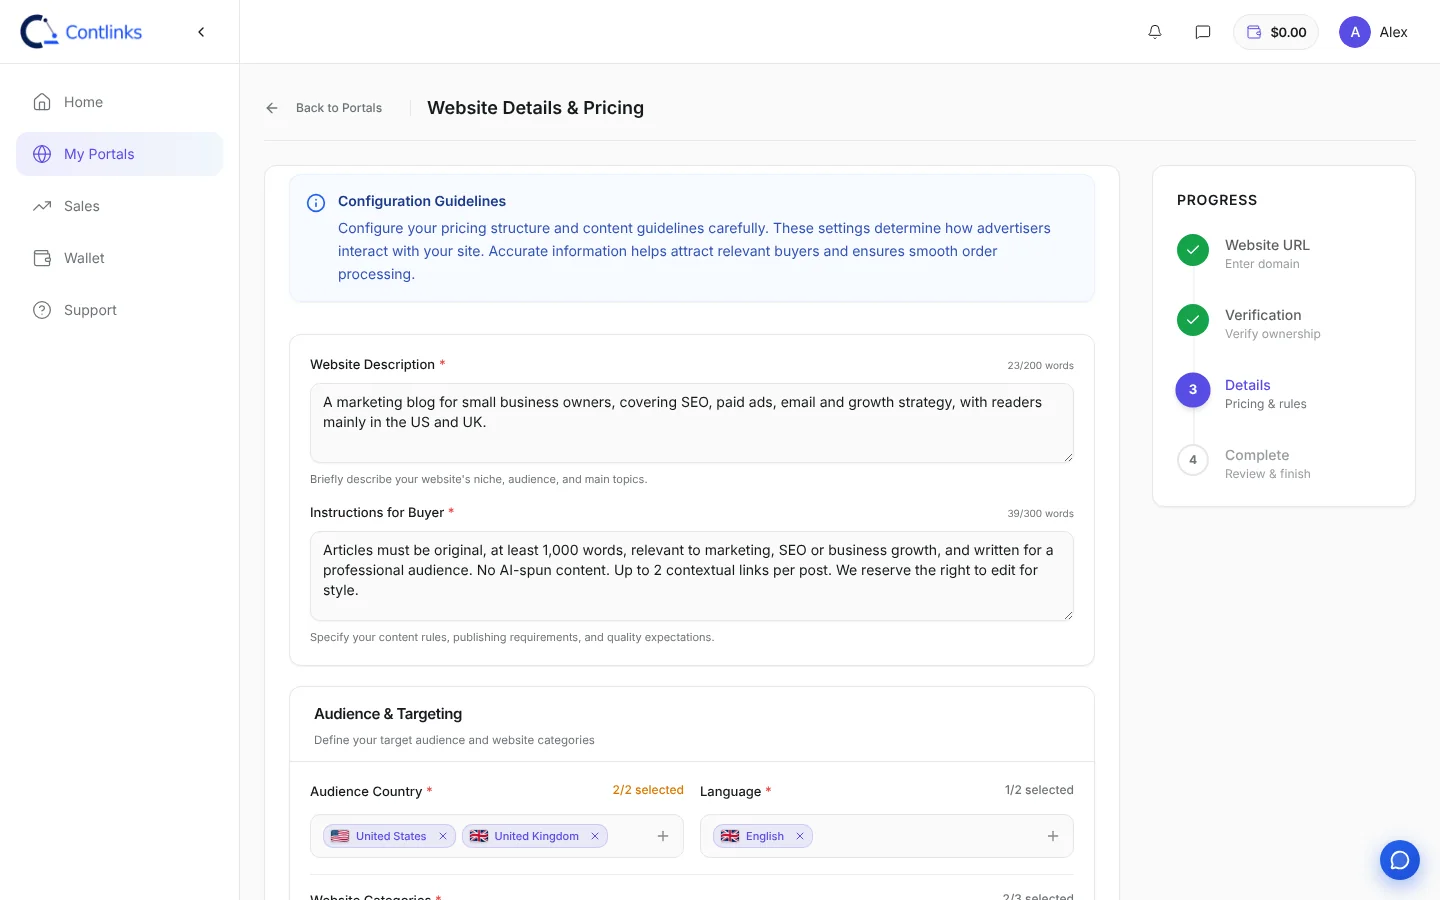
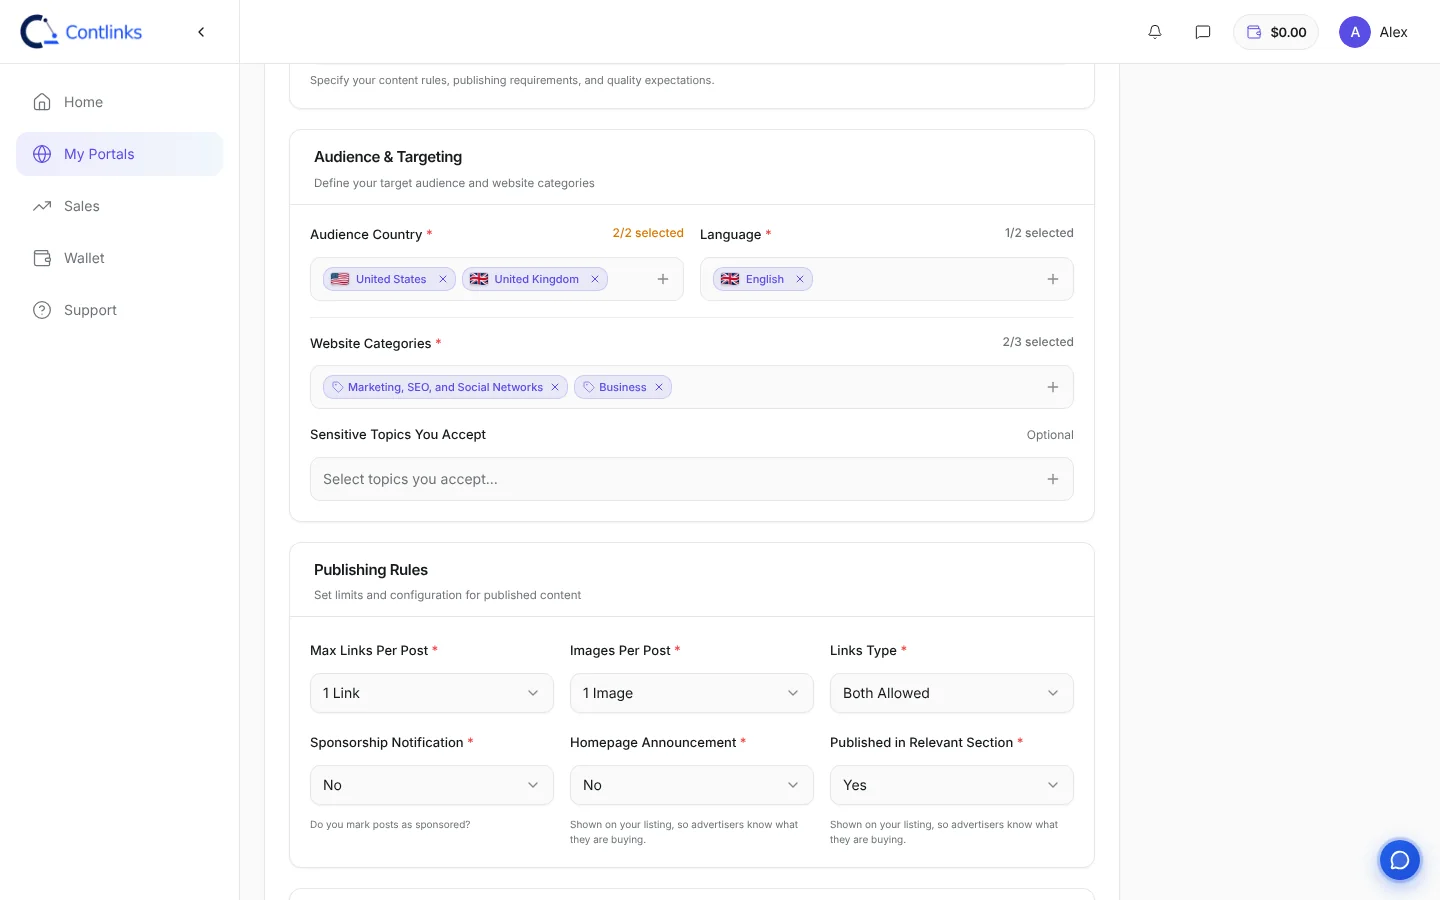
The Details step controls how your listing looks to buyers:
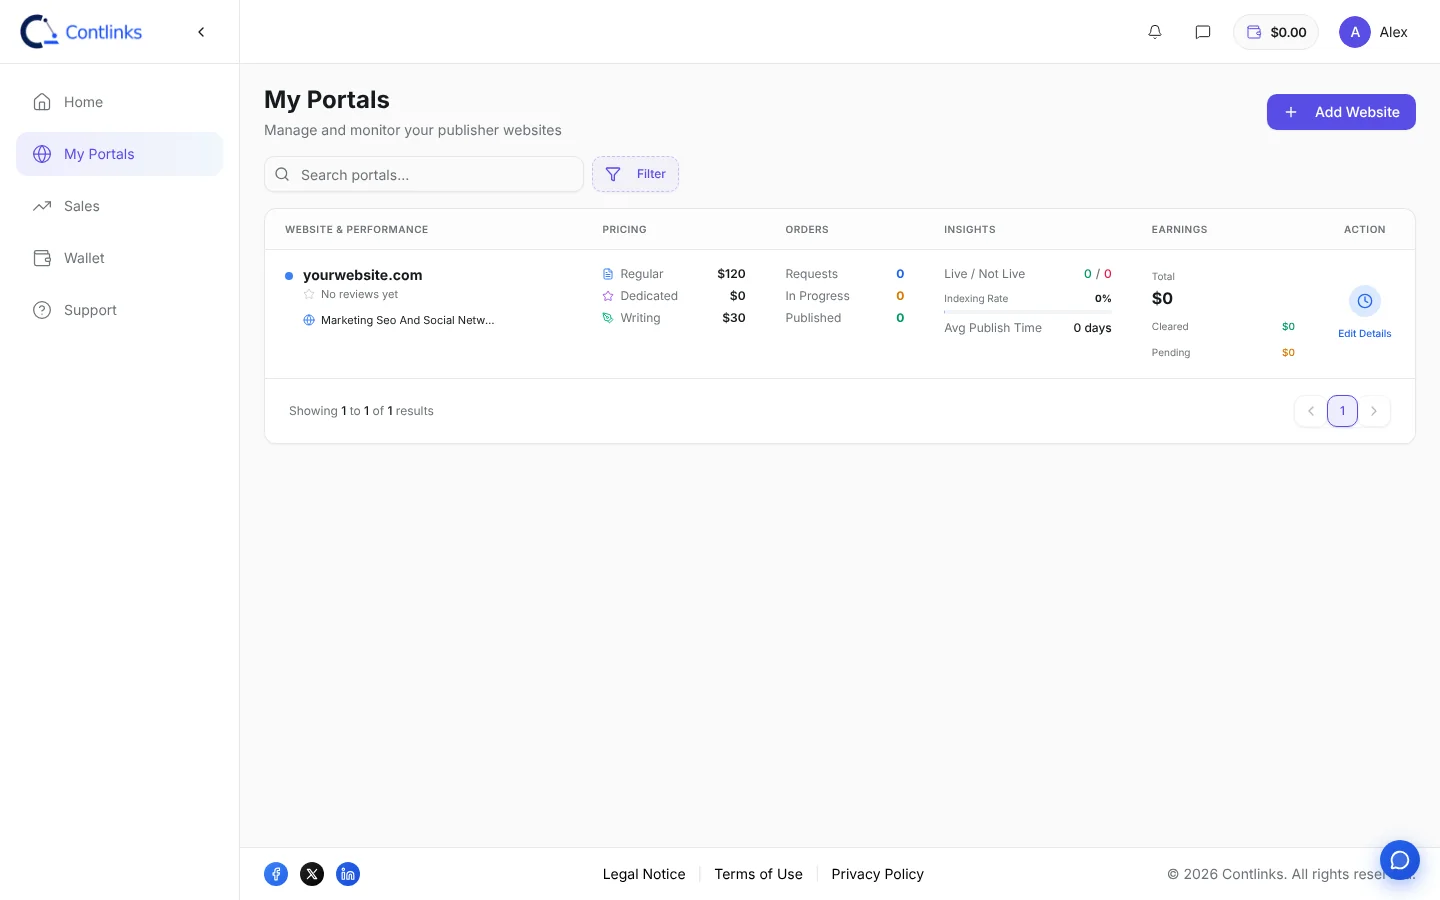
Click Save & Continue to submit. Your site then appears in My Portals with its prices, orders and earnings, and you can change anything later with Edit Details. There are no listing fees. Contlinks keeps a 20% commission only on completed orders.
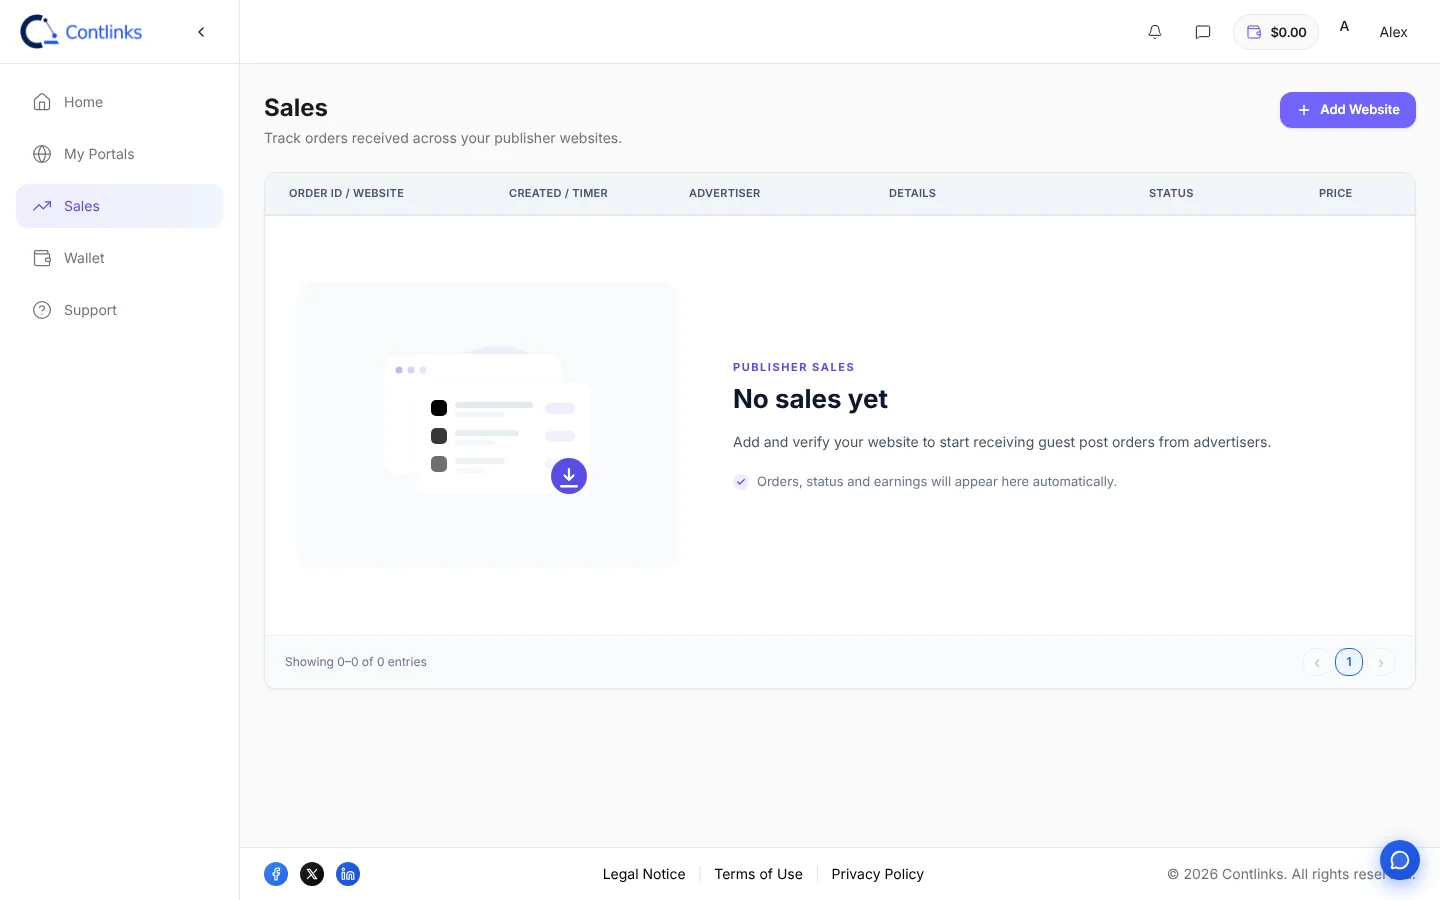
New orders appear in Sales with the order ID and website, the timer, the advertiser, the order details, status and price. Review the buyer’s article or brief, then accept it, ask questions in the order Chat, or decline it. Once the post is live, submit the live URL from Actions. Payment is released when the buyer approves, or automatically 7 days after you submit the URL. Keep the link live for 12 months to honour the link guarantee.
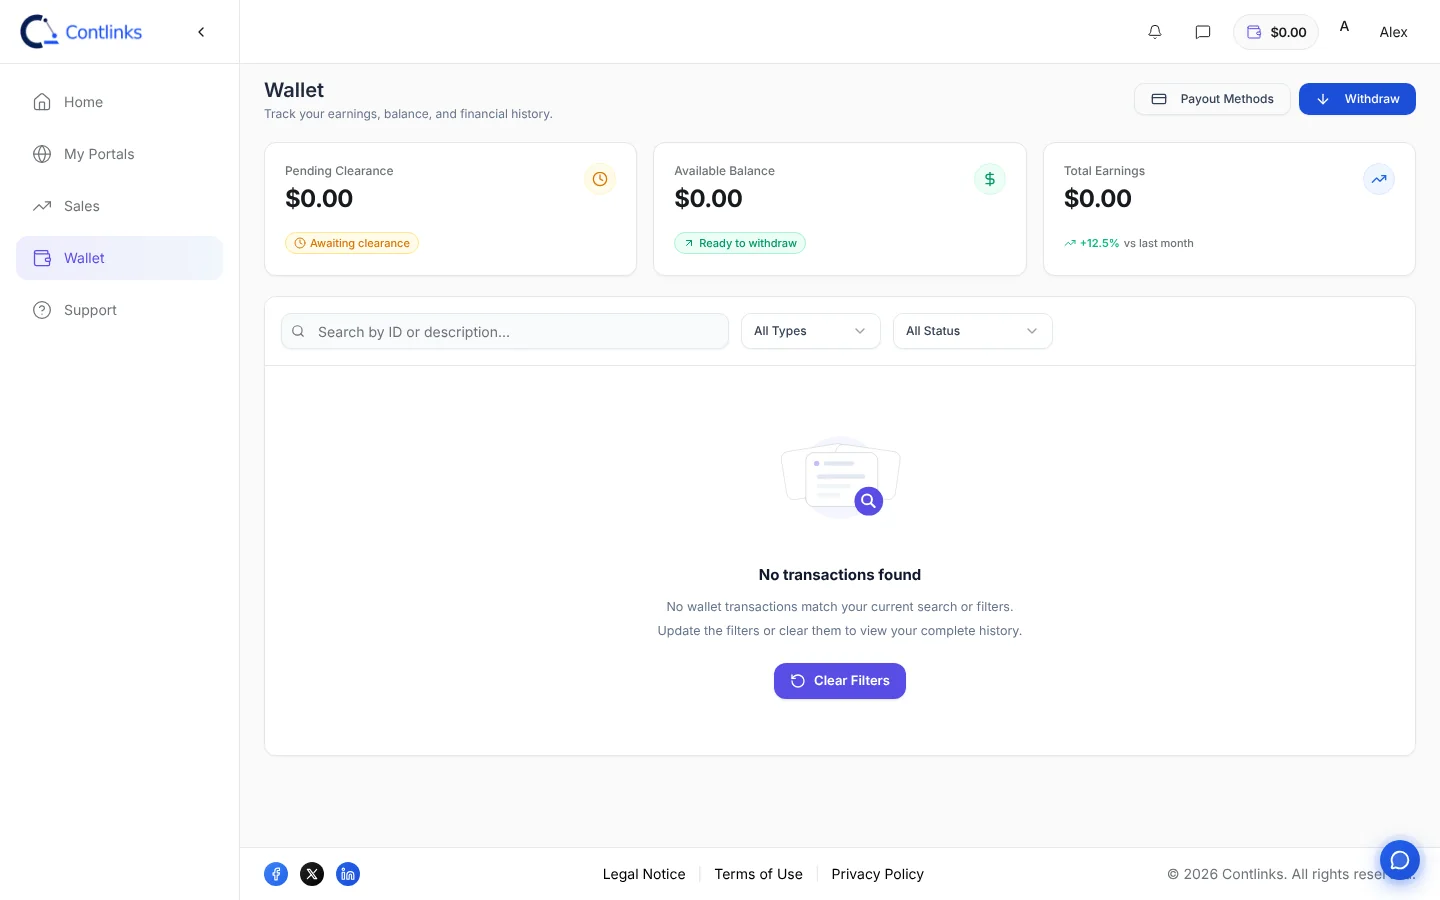
Your Wallet shows three figures. Pending Clearance is money from orders that are not yet approved. Available Balance is ready to withdraw. Total Earnings is everything you have earned.
The minimum withdrawal is $50. Payouts are processed within 3 to 7 days, and a 2% payment processing fee is deducted from each withdrawal.
Was this guide helpful?